Introduction to the Module
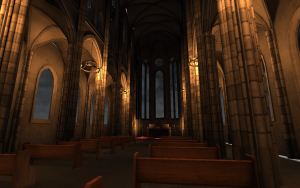
Third year has begun and one of the modules of the first semester is Advanced 3D Graphics. Today we were introduced to the module and given a brief run down of what is to be expected in the following 12 weeks. We were given the option to explore two paths, either an Environment or Character with a Historical theme, I decided to go with the Environment. From there we had the choice of one of three themes, Gothic, Moorish or First World War. I began researching into both the Gothic and Moorish theme as these two appealed to me most, this included looking at buildings such as the Alhambra, various Gothic Cathedrals, courtyards and so on.
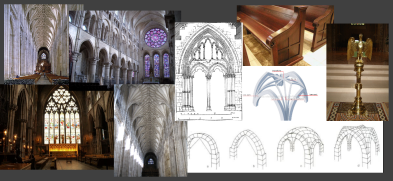
I created a brief moodboard for both the Gothic and Moorish themes however I personally felt I could achieve more with the Gothic theme. Moorish architecture had some interesting aspects, high detailed engravings, various mosaics and so forth however I felt that Gothic architecture held a more promising avenue into creation. From here I developed the Gothic moodboard further, gathering images on multiple examples of the architectural style. These included courtyards, both interior and exterior of Cathedrals, crypts and general Gothic styled furniture. After weighing up my options of how best to display the theme, I decided on the Cathedral. When people think of Gothic architecture most people picture large spires, tall pillars, arches, the list goes on. All these are aspects of a Cathedral, which I felt best represents the theme.
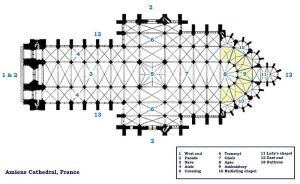
The next step was to look into cathedrals more specifically starting with dimensions. An example I looked at was St. Vitus Cathedral, “Cathedral dimensions are 124 × 60 meters, the main tower is 96.5 meters high, front towers 82 m, arch height 33.2 m.” (1) My initial reaction to this was that it was a lot taller that I had expected, however I feel as though once I get the measurements into Unreal Engine 4 I may feel differently about it. The next step I took was looking into floor plans, the majority followed the same style. (2) This was with a nave running up towards the north and south transept and a curved choir on the end. I felt like this was the most suitable plan to follow as there was a lot of reference on it rather than attempting to create an alternative variant of the floor plan without much to assist me.
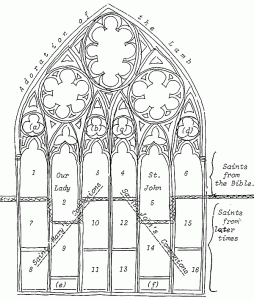
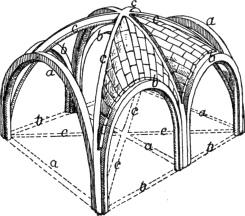
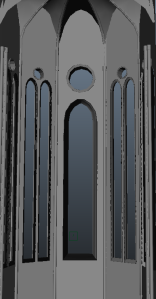
Following the floor plan I began looking at both schematics and close up detailed images of certain aspects of a Cathedral. These included arches, vaulted roofing (3), window frames (4) and so forth. Much like with the floor plans, I looked into these to assist me further into understanding the method of construction for some of the complex geometry. Looking into these schematics helped as I was able to notice which of the designs fit in with the Gothic theme and which were from different eras for example the Romanesque and Baroque eras.
Deciding on the setting of the scene was the next step to take, the colours, lighting, time zone and so on. Firstly I wanted to solidify the time zone, whether or not it was a restored Cathedral would cause a relapse of effects on the other scene focus points. If I were to attempt a modern restored Cathedral I would most likely either be using a series of spotlights/natural lighting which would result in a bright lit up scene. However I wanted to attempt the opposite voting for older methods of lighting. I felt as though the Cathedral wouldn’t have as much colour in it outside of stained glass and patterned flooring, so I decided the scene would have a lot more colour and feel a lot more vibrant if I were to go with candle lights. I wanted to create a dim lit scene with candles and natural sunlight pouring in through the windows. From here I felt as though I had gathered enough to continue through to the next step which was the Blockout Phase.
References
(1) Zhola. (2000). Katedrála svatého Víta. Available: http://zhola.com/praha/cz.php?st=katedralasvvita. Last accessed 3rd October 2014.
(2) G. Dehio and G. von Bezold. (2008). Die Kirchliche Baukunst des Abendlandes. Available: http://commons.wikimedia.org/wiki/File:Amiens_cathedral_floorplan.JPG. Last accessed 03 October 2014.
(3) A. D. F. HAMLIN, A.M.. (1909). A TEXT-BOOK OF THE History of Architecture. Available: http://www.gutenberg.org/files/26319/26319-h/main.html. Last accessed 03 October 2014.
(4) Len Clarke, Jayne Saberton-Haynes and Margaret Cullen. (2014). The East Window. Available: http://www.ssmjchurchyard.org.uk/east_window.php. Last accessed 03 October 2014.
Blockout Stage
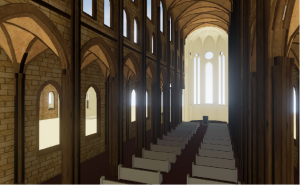
The task I tackled next was the creation of the Blockout, this was fairly simple however I did run into an issue that I had previously worried about. The height of the Cathedral that I had referenced before seemed to completely tower over the rest of the map. Now be this as it may in most Cathedrals, I felt as though to ensure that enough attention was being brought to the architectural complexity of the vaulted roofing I should lower it. From this I had to throw out the idea of keeping to the correct scale of the St Vitus Cathedral I was previously using for citation. After I made the slight edits to the height of the pillars and overall the Blockout, I began placing in basic lights just to give the idea of where the light sources were going to be. In the showreel below you will be able to visibly see the mock chandeliers that I created as the main source of light for the scene.
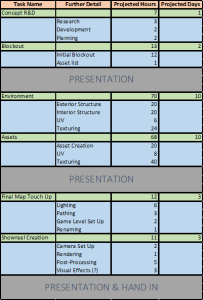
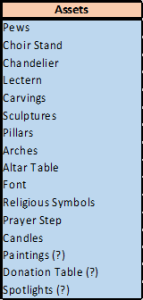
From the cinematic render I was fairly happy with the current state of the blockout and the direction that the project was heading in. The one doubt I had however was regarding the open spaces and how to fill them, I had placed in basic BSP brushes to signal where the rows of Pews will be within the scene. In my plan I created a small list of assets that I plan to add into the map and in my head I had set out which of these assets were going to become a priority and which of those I could leave out. There are a few that I had added in with a “(?)” next to it to signal that I was still unsure about whether or not they would fit into the scene. Alongside the list was the projected plan and hopeful outcome of each of the stages to follow. The breakdown is fairly simple and rather than having a typical gaant chart, I elected to go list out each task with an estimated amount of hours and days it will take.
Development of Main Assets
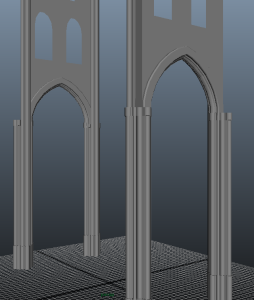
Recently I began modelling the main assets with the mindset of creating a scene with modular pieces. To start I focused on the pillars as I felt these would help me break down the scene so that I can create one section and then duplicate it between these pillars. There are multiple variations of pillars within Cathedrals, some are a single cylinder and some seem to be a a group of them. Below you can see the mesh I had created for them, I felt as though the multiple cylinder pillar brought out more depth to the arches and overall structure of the scene.
The next part I created was the arches, from the reference images I had gathered previously I noticed that the arch is shaped in conjunction with the pillars. As you can see from the image below the pillar has several cylinders that jut out as does the arch, this helped a lot when creating the modular pieces as I was able to consistently line up each of the sections without having any trouble. The progress at the moment is only basic and there is still a lot of modelling to go from here, I am still yet to create the aisles either side of the nave yet as well as the transept and choir.
Modelling Progress
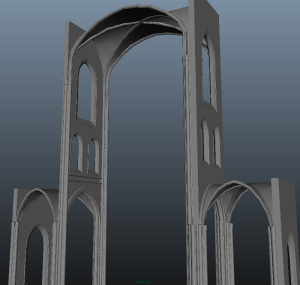
The structural modelling has been completed at this stage, below you will see a screenshot of both the modular nave part and the choir segment that is finished. However I have left out an image of the transept as I am currently in debate about whether or not I will continue with that part of the scene. With Alpha just around the corner I am lacking in ways to fill out the scene and therefore the map looks like it is extremely empty. While the architectural grandeur of the fully built Cathedral does look good, however I feel as though it may be necessary to make cuts to it to ensure that the desired environment actually carries and atmosphere and has a focus point rather than a wide area of empty space.
The issue with the transept caused a major setback in the overall projected plan as I had wasted a lot of time in making it and fitting it into the scene. The rest of the tasks on the plan will definitely suffer from this and sadly it has left a lot to be desired from the current state with only the main structure complete and a couple place holder assets in place. I will raise this question whether or not to keep the transept in my Alpha presentation.
A slight worry I have for the Alpha presentation is that I haven’t touched on textures yet, in my part this is an issue with bad planning, time keeping and so forth. At the current moment the map only contains the structural mesh with the alternate idea without the transept beside it. I will attempt to create a basic colour texture to try and give off the kind of colour scheme I am trying to achieve.
Alpha Stage
As mentioned in the previous post, I had managed to fall behind and this was confirmed today during my Alpha presentation. The scene that I had produced lacked a lot, it had no textures, no real focal point and no direction as to where the project is going to end up in the following weeks. I understood the state that I was in and as I had discussed with my lecturer, my main goal should be to get the assets into the map and try and bring some life to it. The scene needed a focus point and with that I began creating an Altar. This would serve as the centrepiece for the map and will hopefully bring some life to an otherwise dull and empty scene.
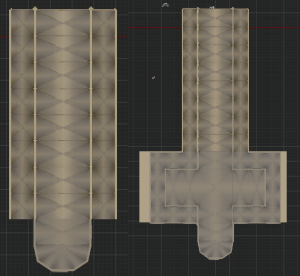
During the lecture on the day of the Alpha I discussed the issue I was having with the transept with another member of the course and he advised a similar thing, this was to ditch the transept completely and close in the map. In this case just having the nave, choir and aisles either side, below you can see a change in map layout. This will allow me to focus on a smaller scale and attempt to fill out a smaller space which will hopefully create an atmosphere that the scene is somewhat lacking. I created a list of essential assets I will create to fill the scene out a little more, these include an Altar, Pew, Lectern, Chandelier, Candles, Prayer Step and finally a Book. The reason I prioritised these is because they are commonly found within Churches and Cathedrals and will allow the current theme to be recognised.
Asset Creation
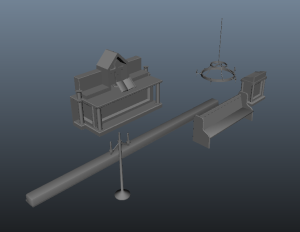
Following the Alpha presentation I created the assets I had listed before as visible below this post. I had to urgently produce these as I was running behind on the schedule if I were to take any more time with modelling I feel as though I would have slipped behind a lot further. The basic assets when placed into the scene allow the viewer to get more of a Church vibe from it rather than the bland atmosphere that was given off previously.
When I had created these assets I began UV unwrapping all of the meshes. This task wasn’t too challenging and there isn’t much to elaborate on, I was able to complete the UV unwrapping within a couple days. The next step I decided to tackle before heading onto texturing was lightmapping. Having briefly worked with lightmaps before in Unreal Development Kit, I was able to produce these quite quickly. I noticed in the update to UE4 version 4.5 there was an option to “Generate Lightmaps”, I decided to try this however I had issues with overlapping UV’s and decided to just carry on creating them myself.
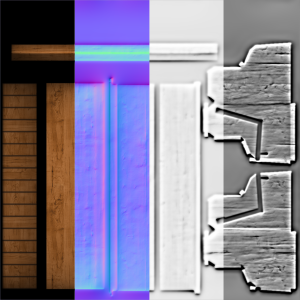
The next task on hand was texture creation, I had heard a few people on the course had begun using Substance Painter to create their textures. After a brief look into the program I felt as though the service it offers seems like one I would like to at least attempt as it may improve my workflow. However I was unable to due to the asking price for the program being too high. I decided to stick mostly with Photoshop, using programs such as Crazybump to assist me with creation of normal, specular and occlusion maps. Below is the Pew texture files compiled into one to give you an idea of what I was creating. The next steps towards finalising this project is creating the lighting, camera work and any post processing effects that I wish to add into the final cinematic.
Particle Effects & Brief Look at APEX
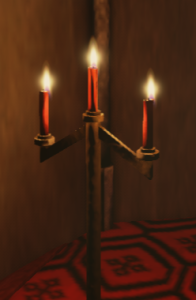
For the chandeliers, I decided to attempt a particle effect rather than to have one single light source for each of the chandeliers. I first and foremost looked at the particle effects that UE4 has currently on its content library however these do not resemble anything close to a candle flame. I searched online and managed to find a youtube video with a guide into creating your own particle effect for a candle light. Below you’ll be able to find both the youtube video I had followed and an image of the outcome from UE4. Overall I’m happy with the outcome as I had never looked into particle effects within UDK let alone UE4 so this area was completely new to me.
Following the creation of the candle and the previous assets, I figured I had extra time to add in something else. I decided on creating some banners to place against the pillars. These helped break up the modular pillars a little and added in a little more colour to the scene. The model and textures are both fairly basic however the main goal for creating this was to look into cloth materials within UE4. I had done a little research on this and the main plugin people were using was called APEX or PhysX Clothing. Unfortunately I was unable to attempt this and implement it into the map however this is definitely something I will look into in my free time and attempt to create. If I had more time left over at the end I would have focused on creating this so that the banners can flow a lot more freely instead of looking rigid.
Final Touches to the Map
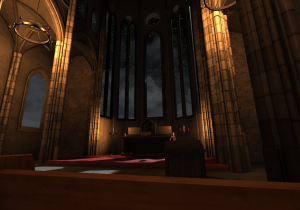
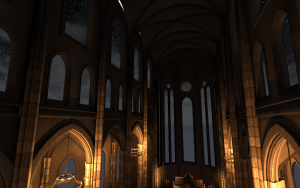
With the textures, lightmaps, assets all set up in the scene it was time to start refining the lighting. To begin with I dropped the sun height completely to -1.0 so that I could attempt a night sky effect, the result was quite good however it still looked quite plain. I attempted to place a spotlight outside the choir windows to create a “God Ray” effect however this didn’t work. I began looking into ways of creating effective lighting and came across Light Shafts, adding this was extremely basic as it was an option in the Directional Light. I then tweaked the light intensity from the Directional Light however this clashed with the night sky effect, to counter this I raised the sun height to give the effect of a setting sun which worked well with the light shafts shining through the windows. After this I focused on creating the lights for the chandeliers, the particle effect already emitted light however it bright enough to light up the surrounding area effectively. I placed a point light in the center of each chandelier to enhance the particle effect brightness without causing any issues with the emitter itself. I repeated this for the two candles either side of the Altar aswell.
Setting up the cameras in the scene was basic as I had already done this during my Blockout presentation. I wanted to keep a slow steady pace throughout the cinematic so that I could uphold the feeling of it being in an actual Cathedral. I didn’t want any sudden sporadic movements because this would counter that effect quite heavily. After setting up the Camera splines I looked into ways of enhancing my final render through Camera Tint, Bloom and Vignette. Bloom helped a lot with the previously mentioned Light Shafts as it enhanced the intensity of the light coming in through the window without being too bright that it engulfs the scene. I added a slight layer of Vignette to the cameras so that it could enhance the falloff from the candle light. Finally I added a tint to each of the cameras just to further enhance the faint orange light caused by the setting sun.
Initially my reaction to Alpha was a slight panic, I had fallen behind substantially and with a short discussion with my lecturer I was guided in the right direction of what to do. I had set out to finalise the assets and give the scene more character and a better atmosphere. This I felt I achieved with the addition of these assets, particle effects and lighting. Although I didn’t have my cinematic prepared for my presentation, I felt that I had closed a large gap between the stage my Alpha presentation was at and the state of my map at the final presentation.
Final Cinematic and Project Wrap Up
To summarise, this project brought forward a lot of challenges for me. A huge challenge I faced that I was unable to overcome was the windows of the Cathedral. I wanted to create an opaque stained glass window effect around the windows on the choir however I was unable to achieve this. Below is an image of what the outcome was and the solution I used for the windows. I chose to create a slight frosted glass texture using multiple nodes including Fresnel, Noise, Multiply and a Constant. Combining these together like in the image below I was able to create a frosted glass texture. While this didn’t give off the desired effect, it acted as a slight substitute as I was unable to test and play around with the opacity of the original window design. If given more time this is an area that I would have looked into further and been able to achieve. Alongside the stained glass windows I would have liked to have created a reflection of the stained glass effected by the sunlight. This would’ve brought even more colour and diversity to the map as it’d help break up the basic orange and red colours.
Another slight issue I encountered was to do with the first set of Lightmaps. To begin with the lightmaps overlapped which caused an issue when building the lighting, following this issue I had problems with light bleeding through the meshes which in some cases I was able to fix but not all of them. Again if given more time this is an area I would’ve liked to focus on further.
On the plus side I was able to explore a new version of the Unreal Engine, as previously I had only worked strictly on Unreal Development Kit. I feel a lot more comfortable using UE4 than I did using UDK which personally is a positive point to take away from this module in itself. More importantly however I was able to learn things that I hadn’t yet had success in. These include lightmapping, particle effects and realistic lighting. The lighting I had previously been creating was underwhelming, however upon looking into the options at hand from UE4 I was able to create better effects and give a scene more atmosphere.
If given more time I would most definitely look into the APEX plugin as it looked very interesting and the final effect that can be achieved from it seems extremely desirable when working with cloth materials. As stated above I would also like to learn more regarding opacity and coloured light refraction as I feel the scene would have benefited greatly from using these. Furthermore I would have liked to look into other methods of lighting as I’m certain there are other effects achievable.
Mitchell Wallond
100260589
Computer Games Modelling & Animation
